Saturday, November 24, 2007

Fused Plastic Tutorial

It's 20 days and counting till I leave for the craft fair in Chicago. I keep adding things to my list of things to do, and frankly it isn't getting smaller because of it.

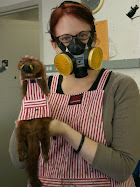
Here is the finished project today:


It is a re-purposed plastic messenger bag made of Stew Lenards produce bags. The learning curve on sewing plastic bags is a little steeper than I thought, and this one didn't turn out as *perfectly* as I had hoped. The next 4 should go a little smoother. Here is how I made it in case you are feeling super crafty yourself.

Things you'll need

-Plastic bags- about 20 should do for a 10x14 inch messenger bag.

-Iron set to medium (you will need to adjust the temp depending on your iron)

-Kitchen Parchment Paper

-Your Ironing board or an ironing surface

-An open window-burning plastic is INCREDIBLY TOXIC.

-A simple pattern and notions for a messenger bag (I made mine myself, but if you are new to sewing-buy a simple one)

HERE WE GO!

1. cut apart approx. 20 plastic bags into flat sheets of plastic. Cut off the handles, the fused bottom seam and slice the bag open.

2. layer the bags between 2 sheets of cooking parchment paper so you have at least 8 layers of plastic in all places. -The parchment is important- be sure your iron does not touch the plastic directly- wax paper will leave a waxy residue and the plastic bags may stick to regular paper.

3. Start ironing! It is important to start in the middle, keep the iron moving at all times and not to let the plastic scorch. If you accidentally burn the plastic you will release VERY TOXIC FUMES that are big time bad for you, your pets and especially kids.

It takes about 20 minutes of ironing to get the sheet flat, smooth and even. If you see a lot of air bubbles, you may need to poke a pin hole in the plastic and iron over the area again.

****Note*** the ink used to print on plastic bags releases with heat. Turn bags inside out, or sandwich between clear bags to keep the ink from releasing all over the place and making a huge mess.

4. Once you have one side nice a flat, flip the whole piece (including the parchment) over and iron the other side till the entire piece is flat, smooth and feels like it is one piece of plastic.

5. Allow the piece to cool, peel off the parchment and start cutting. I flat lined (sewed each piece to it's lining individually) and serged my pieces because I want the bags to be nice and strong, you should test it out and decide how you want yours. Turning pieces inside out smoothly is difficult, so you may want to alter your pattern so you don't have to 'flip' any pieces.

6. Sew and finish your bag following the pattern instructions - remember you CAN'T iron the plastic directly- you must sandwich it in parchment paper.


Additional Notes:

- practice with different plastic bag types to find one you like. Do a practice piece to get your pieces fused smoothly and completely and your iron temp correct.

-Make sure you have enough plastic to cut your pattern pieces without having to overlap them and that you have 8 layers of plastic in the areas you are cutting. Less layers and you will have a weak spot in your bag.

-Plastic has NO grain, so you don't have to worry about grain lines on the plastic, but you should follow them on your fabric lining.

-Pencils don't mark on plastic so use a ball point pen for your markings.

-Send me a picture of your bag.

Sunday, November 18, 2007

Stuff Done

After a weekend full of crafting and working I have finished a few of the items on my to-do list. Taaaa Daaaaa


Introducing Sushi Ornaments (8 of 15 done)


Re-Purposed Sweater Clutch Bags


and last but not least Re-Purposed Sweater Hand warmers!


It has been a busy 48 hours. I fought the good fight with my serger, attended a full day of dress rehearsal for A Christmas Carol and even a did little grocery shopping for good measure. I also managed to have a couple of sales on my etsy site. It was a very full and pretty satisfying two days. Hopefully I will be able to keep the momentum going.

Friday, November 16, 2007

Holidays


I have been kicking into crafty overdrive lately. Between getting ready for dress rehearsals of A Christmas Carol (at work) and prepping for the holiday artisan market in Chicago as well as getting stuff loaded onto my etsy site I am exhausted. I always allow myself to get in a little over my head between September and December, but I think this year may be the most I have ever produced.


Of the crafty items I wanted to get done for the holiday market I have these done


- 15 repurposed plastic wallets ( I already sold a couple)

- at least 12 skeins of variegated yarn and a few self striping

- 10 silk scarves and shawls

- 8 crafty roll-ups

- 5 sets of fancy stitch markers

- Ear warmer knitting patterns


Things to still be done


- 3 repurposed plastic messenger bags

- Sushi Christmas Tree Ornaments ** they just need their hangers**

- 5 repurposed wool wallets

- 3 repurposed wool clutch bags

- 2 knitting patterns for hats

- knitting pattern for self striping yarn hand warmers

- More Fancy stitch markers

- A couple more crafty roll-ups

- Button collage bracelets

-Clutch Bag knitting pattern

-5 hemp scrubby shower pads

-knitting pattern for 2 skein shrug


I think I will be able to get everything done before I leave on the 14th... Oh, and I still haven't started on Christmas gifts......Yet. The good news- I am getting closer everyday to total world crafty domination.


Sunday, November 11, 2007


I took the handmade pledge. The handmade pledge is a promise to make or buy handmade and fairly traded items for holiday gifts and ask that others do the same for you. Seems simple enough. So go take the handmade pledge, feel good about yourself and support indie artists and designers in your in your community (including your global community). The link is on the left of my page header. Go do it, I'll wait for you.......

Speaking of. Here is a quick preview of one item I am working on for the craft fair in Chicago and etsy.com. This season I am trying to take my focus away from silk scarves ( although I'll still have some) and move it more towards re-purposed and recycled found objects. The wallets are made from plastic grocery bags fused together and made into something other than landfill. As Martha might say- It's a good thing.


Wednesday, November 7, 2007

HOLY MOLEY


I've been stupid busy the last couple of weeks. I promise some great pics of stuff I am working on for the holidays will be posted on Saturday. Until Then- Enjoy this commercial break featuring silk scarves I painted using the serti painting technique. I think they look a little like stained glass.